WordPress: Creating TinyMCE Custom Buttons
Creating a custom button that adds a shortcode to trigger a plugin’s actions allows for better usability of that plugin. Users won’t have to remember what that shortcode is, and it saves time in the long run. There are three different files required for this to work: plugin-name.php, plugin-name.js, and event-subscription.png. For this tutorial I will cover an example for a plugin that adds a TinyMCE button that generates a shortcode for adding a subscription button for subscribing to email updates on upcoming events that one might host.
Part 1: The .php file
This is the file that’s needed for the plugin to be recognized by WordPress, and will appear in your Plugins page once you have it uploaded to your /wp-contents/plugins directory. If you haven’t made a plugin before, the basic required field is Plugin Name. There are other fields that you can fill in as well such as Description, Version, and Author.
<?php
/*
Plugin Name: Event Subscription
Description: Simple plugin to insert event subscription button on posts
Version: 2.1
Author: Sue Feng
Author URI: http://suefeng.net
License: no license needed
*/
After adding the plugin information, you’ll want to create what code to assign the shortcode to and put it inside a function so you can call it later. In this case, it’s this code snippet:
function subscribe_to_event() {
    return '<a href="/subscription?keepThis=true&TB_iframe=true&width=470&height=200" class="thickbox"><img src="/wp-content/themes/yourtheme/images/notification-button.png" alt="Subscribe to Upcoming Events"></a>';
}
This goes after the text in /* ... */.
Next, assign the shortcode so you can use it later. Say you want the shortcode to be [event_subscription], then use the following:
add_shortcode( 'event_subscription', 'subscribe_to_event');
The first field, event_subscription is the shortcode while subscribe_to_event is the function you just created that contains the code to return.
After assigning a shortcode, register the button.
add_action( 'init', 'eventSubscription_buttons' );
function eventSubscription_buttons() {
    add_filter( "mce_external_plugins", "eventSubscription_add_buttons" );
    add_filter( 'mce_buttons', 'eventSubscription_register_buttons' );
}
function eventSubscription_add_buttons( $plugin_array ) {
    $plugin_array['eventSubscription'] = plugin_dir_url(__FILE__) . 'EventSubscriptionTinyMCE.js';
    return $plugin_array;
}
function eventSubscription_register_buttons( $buttons ) {
    array_push( $buttons, 'eventSubscription' );
    return $buttons;
}
Below is all the code put together for event-subscription.php:
<?php
/*
Plugin Name: Event Subscription
Description: Simple plugin to insert event subscription button on posts
Version: 2.1
Author: Sue Feng
Author URI: http://suefeng.net
License: no license needed
*/
function subscribe_to_event() {
    return '<a href="/subscription?keepThis=true&TB_iframe=true&width=470&height=200" class="thickbox"><img src="/wp-content/themes/yourtheme/images/notification-button.png" alt="Subscribe to Upcoming Events"></a>';
}
add_shortcode( 'event_subscription', 'subscribe_to_event');

add_action( 'init', 'eventSubscription_buttons' );
function eventSubscription_buttons() {
    add_filter( "mce_external_plugins", "eventSubscription_add_buttons" );
    add_filter( 'mce_buttons', 'eventSubscription_register_buttons' );
}
function eventSubscription_add_buttons( $plugin_array ) {
    $plugin_array['eventSubscription'] = plugin_dir_url(__FILE__) . 'EventSubscriptionTinyMCE.js';
    return $plugin_array;
}
function eventSubscription_register_buttons( $buttons ) {
    array_push( $buttons, 'eventSubscription' );
    return $buttons;
}
Part 2: The .js file
After creating your php file, you’ll need to create a JavaScript file for telling TinyMCE to create a button in the WordPress post editor.
Below is all the code for event-subscription.js:
(function() {
        tinymce.create('tinymce.plugins.eventSubscription', {
                init : function(ed, url) {
                        ed.addButton('eventSubscription', {
                                title : 'Event Subscription',
                                cmd : 'mceExample',
                                image : url + '/event-subscription.png',
                                onclick : function() {
                                    ed.selection.setContent('[event_subscription]');
                                }
                        });
                },

                getInfo : function() {
                        return {
                                longname : 'Event Subscription',
                                author : 'Sue Feng',
                                authorurl : 'http://suefeng.net',
                                infourl : 'http://suefeng.net',
                                version : "2.0"
                        };
                }
        });

        tinymce.PluginManager.add('eventSubscription', tinymce.plugins.eventSubscription);
})();
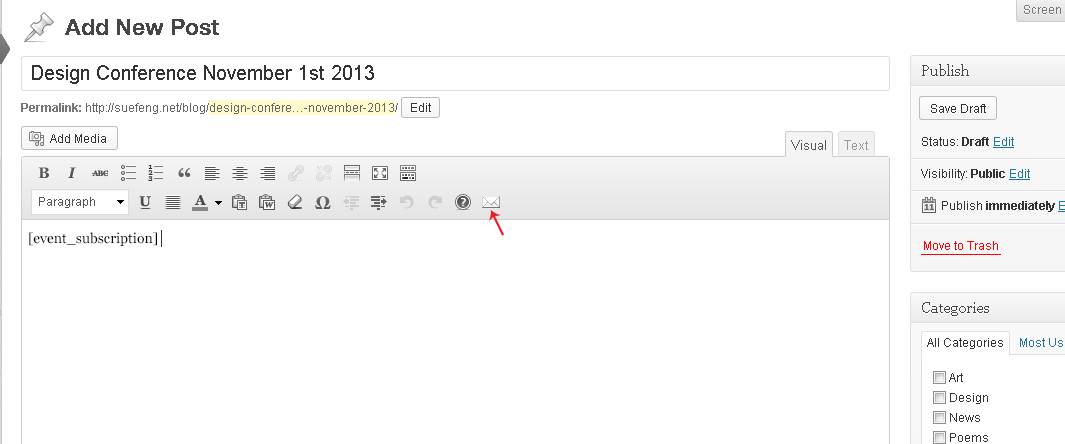
Then you’ll need to make your button image, such as this:
event-subscription.png (20x20px)
After that you’ll want to put all 3 files in a folder such as event-subscription. Inside it should be your event-subscription.php, event-subscription.js, and event-subscription.png. This folder should go into your plugins.php. I haven’t gone over how to create an event subscription mailing request though since this tutorial focuses on creating a TinyMCE button. This can be simple to make for the most part with wp_mail function and creating a form with email validation, but it can be complicated if you want to make it more secure. Perhaps using captcha may help.
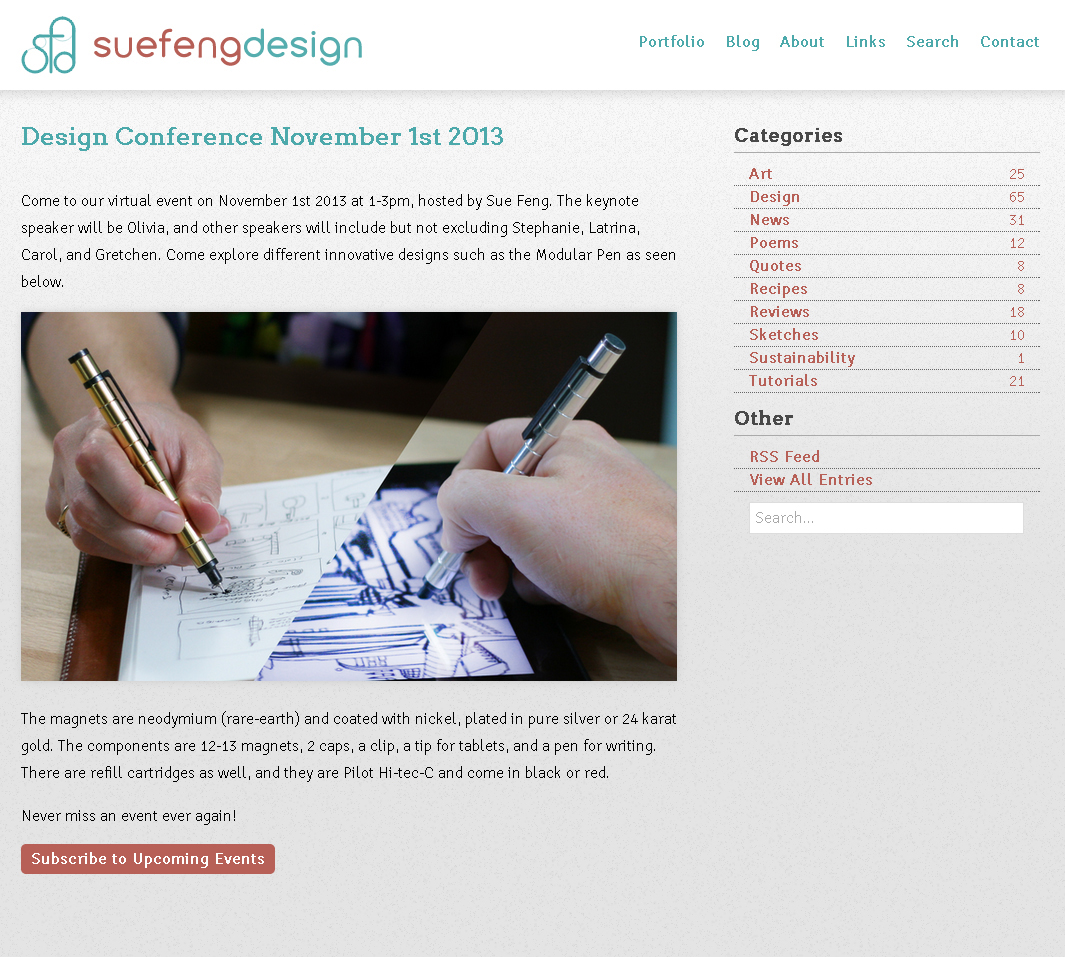
Here are some screenshots to what it will look like: