Mustache Tutorial
It’s been a while since I’ve posted something on here. I’ve got some projects going on in life these days. There is something I can blog about though, that I’ve been putting off. It’s a Mustache demo. It’s similar to Handlebars but it’s been around longer, and I think there’s more you can do with it in that you can use server side scripting as well as client side scripting. For this demo, I used PHP as the scripting language for Mustache. I still don’t know that much about Mustache, but I like to make a demo and share it and blog about my experience thus far.
The first thing you’ll want to do is decide what you want to use mustache for. Mustache is great for creating templates with clean code, but everything is stored in JSON. It’s great if you’re only working on something small, but if you have a lot of content, storing everything in JSON may not be as good as storing everything in a database. There’s more flexibility in what you can do with database content versus JSON content.
Then if you want to use Mustache, you’ll want to download it and put it in a directory that houses your site content. You’ll want to use a server that supports PHP in the case of this tutorial. You can use WAMPServer or EasyPHP, XAMPP to name a few if you want to have it on your computer before deploying it.
Then you’ll want to create a page that contains the information needed to put the JSON with the template and connect them together, inside your site directory. You’ll need this bit of code to start with (index.php):
<?php
include('src/Mustache/Autoloader.php');
Mustache_Autoloader::register();
$entry = new Mustache_Engine;
$entry_template = file_get_contents('entry.mustache');
$entry_data = file_get_contents('entry.json');
?>
<!doctype html>
<html lang="en">
<head>
 <meta charset="UTF-8">
  <title>Mustache Demo</title>
    <link rel="stylesheet" href="style.css">
  <link rel="stylesheet" href="default.css">
</head>
<body>
   <div class="wrapper">
       <h1>Mustache Demo</h1>
      <div class="clearboth"></div>
<?php echo $entry->render($entry_template, json_decode($entry_data, true)); ?>
<?php include('sidebar.php'); ?>
  </div>
</body>
</html>
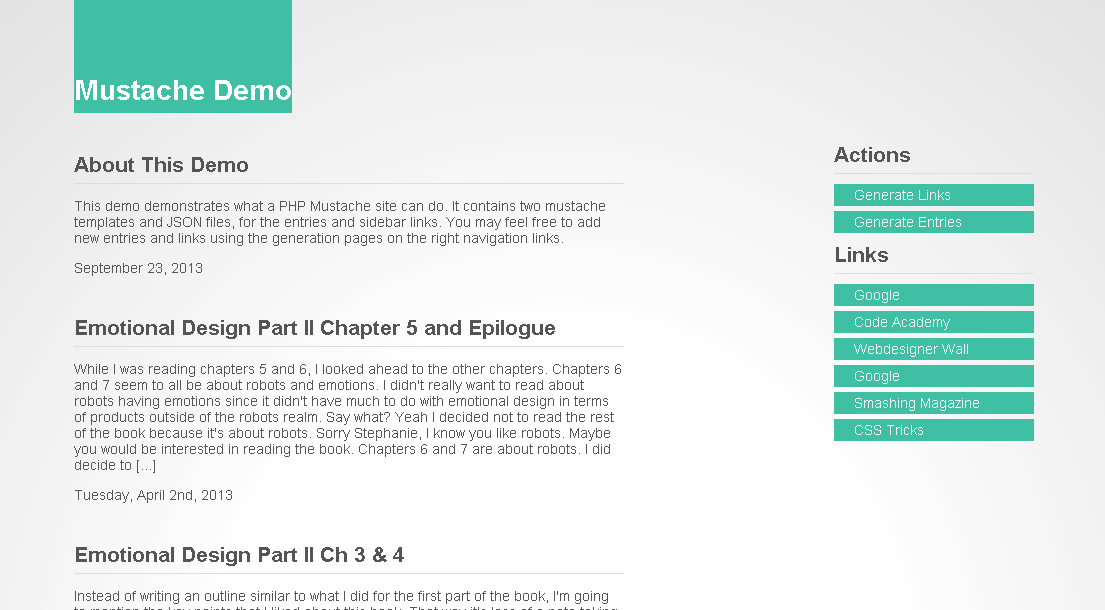
The only files you need to include are the Autoloader.php file and the JSON file, which in this case is entry.json, as well as the mustache template file, which in this case is entry.mustache. that contains the data you want to populate the page with. The JSON files for my demo are viewable through the demo. The template file is as follows:
{% raw %}
<div class="entries">
   {{#entry}}
  <div class="entry">
     <h2>{{title}}</h2>
      <div class="body">{{body}}</div>
      <div class="date">{{date}}</div>
  </div>
    {{/entry}}
</div>
{% endraw %}
{% raw %} As you can see, the JSON content will be placed within the {{#entry}} and {{/entry}} and it loops through all the entries, placing the title in {{title}} and body text in {{body}}, and the date in {{date}}. This template content is then placed in the previously shown page where it says {% endraw %}
<?php echo $entry->render($entry_template, json_decode($entry_data, true)); ?>
Here’s the template for the links in the sidebar in the demo (links.mustache):
{% raw %}
<div class="sidebar">
  <h2>Actions</h2>
  <h2>Links</h2>
  <ul>
    {{#links}}
    <li><a href="{{linkUrl}}" target="_bank">{{linkName}}</a></li>
    {{/links}}
  </ul>
</div>
{% endraw %}
{% raw %} The links will loop within the {{#links}} and {{/links}} and the url and name places are self explanatory. This template is used in conjunction with sidebar.php. sidebar.php has a similar setup as the php page, index.php as mentioned above, only it’s connecting to the links.json and links.mustache. {% endraw %}
<?php
$links = new Mustache_Engine;
$links_template = file_get_contents('links.mustache');
$links_data = file_get_contents('links.json');
echo $links->render($links_template, json_decode($links_data, true)); ?>
Though this certainly doesn’t cover all there is to know about Mustache, I hope this is enough to get you started if you’re a first time user.